During the recent hiatus in working on the car itself, I now have a dinky propshaft thanks to a
company near Heathrow shortening and re-balancing the old one, and I've got a nicely re-conditioned and rebalanced set of alloys by a
company down near Portsmouth.

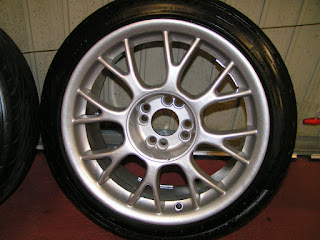
I think they look neat, particularly when compared with their previous condition. They should look good on the car with the centre caps on, but I think the old tyres on them let them down - I wonder if the budget will stretch to a new set...
A couple of weeks ago I got the exciting call from
Westfield that the completion pack was ready, so last Wednesday Gavin and I went up there in an white van causing havoc on the highways and collected it. As always the guys up at the factory were very chatty, and whilst we waited they popped the bushings into the suspension arms that I had been having a spot of bother with. There was a bit more to collect than I had reckoned with, and although it may have just fitted into a light van or estate I was thankful that we had gone equipped with a transit.
Following a terrible drive back through monsoon conditions and against the clock to get the van back in time, I now have more boxes in the garage and a study full of parts.

But I was all set to go!
That is I was up until the point where I started to discover missing or incorrect items such as metric rather than imperial bolts having been supplied for the suspension wishbones. Rather than bodge it, and with a sigh of resignation I sat down with the boxes and carried out an inventory down each washer needed for the next steps and compiled a list of missing items. I suspect this would have been a sensible thing to do at each collection, but when confronted with boxes of shiny goodies Xmas morning unwrapping frenzy sets in.
So I can't complete the front or rear suspension, but I have loosely attached what I can whilst missing some relevant parts (and I've added "tighten up suspension" to my worry list so that clown car style hilarity doesn't ensue when it is finally on the ground). I have finished the brake pipes and installed the main fuel pipes - more chassis drilling along the underside for the fixings for both of those. And the rear wiring loom is now loosely attached to the chassis (more drilling for the fixings for that too - the poor chassis is like a
swiss cheese). Once the loom was in situ I popped in the handbrake, the first part from the donor car to be installed, and connected it up to the loom (and tested it for circuit connectivity when pulled just for fun and an excuse to play with the
multimeter). Putting the handbrake in is way ahead of the point in the instruction manual, but other online build accounts recommended doing it now when tunnel access was still good.
Not quite as fun was the attempt to install the steering rack. The MX5 donor rack was substantially too wide in the main cylinder, so the steering pinion would have been outside the bodyshell - certainly not a good look. Following some checking, it dawned on me that the steering rack that came with the kit that I had ignored as I thought it was for the standard non-MX5 option had to be used, with a couple of adapters bolted to the
tie rod ends and this would then allow the ball joints and wheel uprights from the Mazda to be used. If I had known I would have saved myself some trouble all those months ago reconditioning the MX5 rack, replacing the bent tie rod and indeed going all the way to Wales to get the damn thing in the first place.


Now I'm just waiting for the replacement bolts and whatnot to appear in the post. Until then I'll busy myself working on the front wiring loom ahead of it being needed. A sticky dirty job but one where the end result is quite satisfying.

 I haven't yet connected the steering rod ends to the front uprights - these like a couple of other bolts to set camber and tracking on the front and back I'm leaving loose for now.
 With the wheel uprights in place, it is starting to look a little like a car (well with just a smidge of imagination) !
 Next step - putting in the engine!


